Ready to get started with Etsy? In my previous post, I explained how to make passive income through Etsy. Now, I’d like to go over how to get started – including how to set up your shop and create your first listing.
The great thing about Etsy is there isn’t a huge learning curve. I’ve noticed that other passive income channels take a lot of time to set up whereas with Etsy, it is extremely straightforward and you’ll get the process down quickly.
How to Set Up Your Etsy Shop
In order to set up your Etsy shop, you will first need to create an account.
Once you click that link you’ll click “Register” and fill out the information.
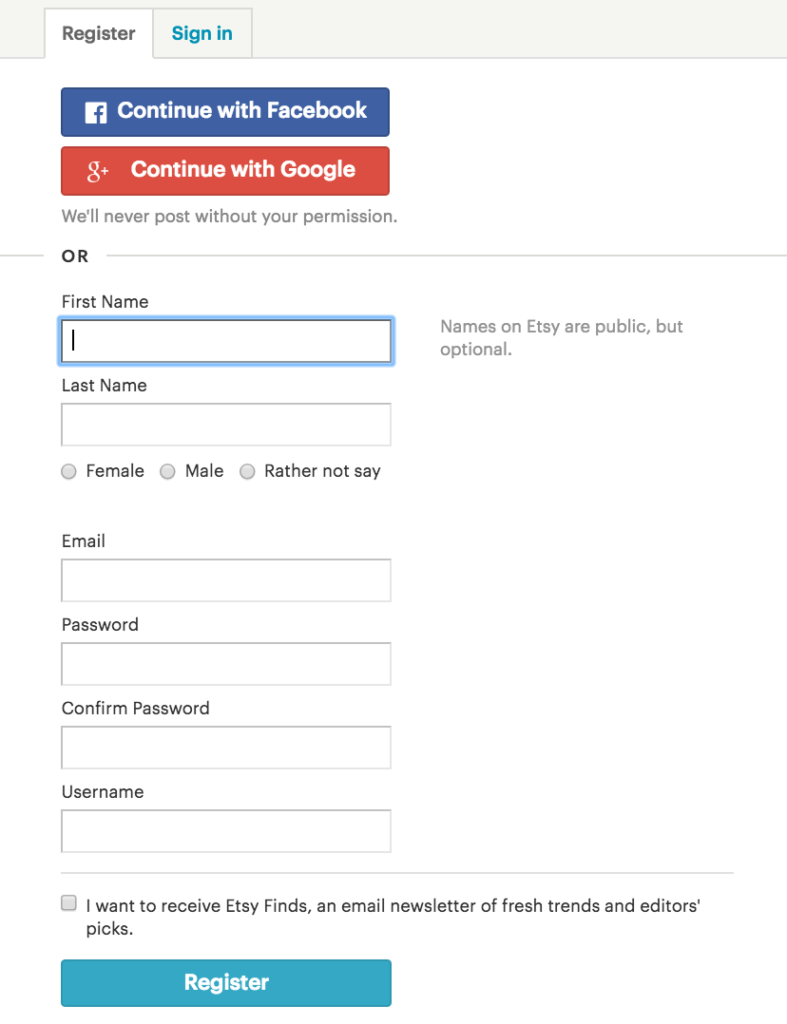
If you’d like to open your own Etsy shop, you can use my link here which gives you a free 40 listings (and provides me with 40 free listings as well).
This will take you to your shop set up page:
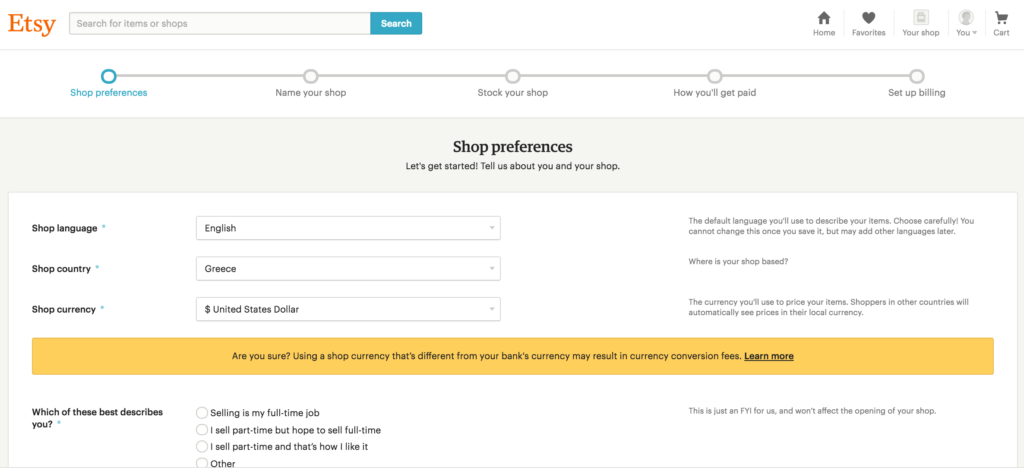
In this section you’ll need to:
• Think of a Shop Name
• Design Logo
• Create and Add Your First Listing
• List your Payment Method
• Set Up Billing
Crafting Your Shop Name
Do NOT dwell too long on your shop name. Reason being is:
1. When you’re buying something from eBay or from Etsy, the shop name isn’t something you remember over other factors.
2. You have the ability to change your shop name instantly once (and for future requests you’ll need to contact Etsy directly).
It’s good to pick a “decent” name but overthinking and going through analysis paralysis isn’t good. Passive income is all about executing on actions. I know a friend who says she wants to open a drop shipping store – but she says she’s been stuck on creating the name for months (and she still hasn’t done it). Don’t let this happen to you! On the other hand, my other friend asked for advice on her domain name, and after going through a few choices we ended up deciding on one and she’s already been doing a great job building her brand.
Here are some basic guidelines on choosing a great name:
- Keep it short and sweet. 1-3 words for a brand name is a good size. Remember you want to make your brand name memorable.
- Relate it to your product or service. If you’re designing something, you could say “____Designs”. Or if you’re making logos, “____Logos”.
- Brand consistently. This applies to logos, shop appearance, etc. If you’ve created a more professional look you should make sure your name sounds professional as well. If you wanted to emulate a cute, fun feel, your brand name should reflect that as well.
How to Create Your First Listing
You will now be asked to add a listing!
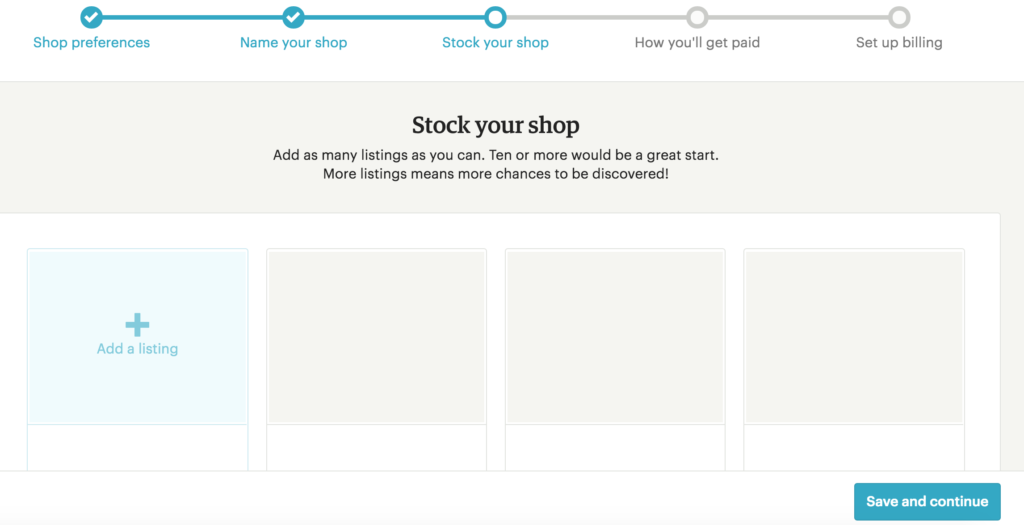
Adding Photography
For digital items, you don’t need to take photography of your product but you will need to design your images via Photoshop or another means. If you’re creating physical listings, make sure you take high quality, professional photos that make people want to click the listing. Note: if you’re creating physical listings it will be harder to ship while living abroad as a digital nomad. However, you can also put your Etsy shop on “vacation”mode if you’re just traveling periodically. For the purpose of these blog posts, I will focus on digital downloads.
Your listing thumbnails are extremely important because they are what captivate buyers to click on your listing and shop around. It’s like when you’re booking a hostel/hotel – the images are extremely high priority.
My rule of thumb:
- I design my images through Photoshop.
- I upload 1000px by 1000px PNG images.
- I add my shop name at the bottom of the image.
- I try to use neutral backgrounds or backgrounds that will help make my product pop. Busy backgrounds do not do as well.
Listing Details
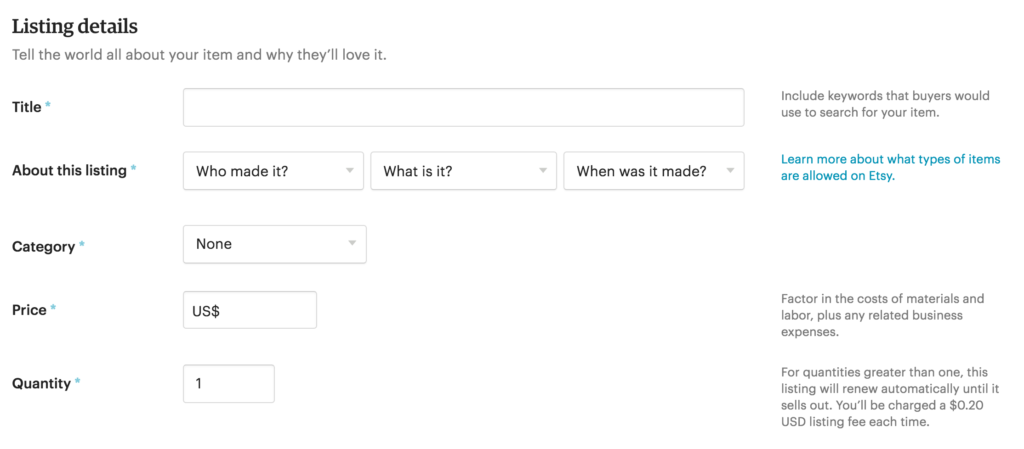
Afterwards, you will fill in the details of your listing. Your Title should reflect what the product is about – but I’ve noticed a lot of listings will do some keyword stuffing. I will create another post on how to optimize your listings (with category details, correct keywords, and titles).
The easiest way to make sure you’re creating your listing correctly is to check up on competitors. I’m not saying to copy, but I’m saying the more listings you view the more you will understand how to craft your listings – how to title your posts, how to create the best thumbnails, etc.
Pricing
For pricing, make sure to factor in certain elements:
- Etsy listing & transaction fees: as mentioned in my previous blog post there are some fees that Etsy incurs:
- Listing Fee: $0.20 a listing which lasts for 4 months time. This equates to $0.05 per month, or $0.60 a year.
- Transaction Fee: Etsy takes a 3.5% commission of your listing price per sale you get.
- Auto-Renewal Fee: Every time you sell something you essentially have to pay another $0.20 to list the next item. If you have remaining quantities of your listing after your sale, Etsy will charge you. So if you have 999 in stock and sell 1 item, you’re going to have to pay another $0.20 for the remaining 998 in stock.
- The amount of time you used to make it: Do you feel your time is worth $20/hour? 30/hour? Or more? All of this will help you gauge what your work is worth. This will also help you understand how to price each item in your shop in comparison to each other.
- Demand for your product & the ease of creating your product: If you’re creating something that most people want and requires a higher level of skill, you can charge more for your listing. For example, creating a WordPress template is much more difficult and specialized than creating a PSD template, so I’ll see WordPress templates run up to $25-50 per product (rather than $5-10 for PSD templates).
- Competitor pricing: See how your competitors are pricing their listings, but do not make your products extremely cheap as to bring down the entire niche to a lower price range.
Quantity
For digital downloads, I put 999 as my quantity number. The listing fee of $0.20 is the same no matter how large of stock you list, and after every sale you have to pay another $0.20 for the remaining stock in your listing. Putting 999 in the quantity number allows you to not have to think about restocking your shop constantly.
Renewal Options
I put my listings on auto-renew. Unless you’re merely testing to see how your product will perform, I would set them on auto-renew to give yourself a more set-it-and-forget-it worry-free mentality.
Creating Your Product Description
After you’ve filled out most of the form, you will need to craft up a great product description. In my opinion, the best method is to really (again) see what your competitors are doing. I definitely wouldn’t copy their descriptions, but I would make sure I were checking off all important points that your competitors are covering.
Usually descriptions may or may not contain the following:
- What the product contains (for digital downloads it might mean: 1 PSD, list of free font files, etc.)
- What the buyer needs to understand (that 1. it is an instant download, 2. basic Photoshop knowledge, etc.)
- Terms of use
- FAQs
- Description of shop and policies of shop
After you’ve filled out your tags (which I’ll go over in the next post) and materials (what your product consists of aka PSD? ZIP? etc.) you’ll basically be set with creating your first Etsy store!
If you’d like to open your own Etsy shop, you can use my link here which gives you a free 40 listings (and provides me with 40 free listings as well).
In the next few posts, I will go over how to customize your shop, optimize your listings, and market your listings. And if you liked this post, you may like: How to Make Passive Income on Etsy.
Part 3: The Basics of a Great Etsy Listing and Etsy Shop
If you would like to learn how to make passive income on Etsy check out my course here, where I’ll guide you step by step in how to achieve the same results as I have.
